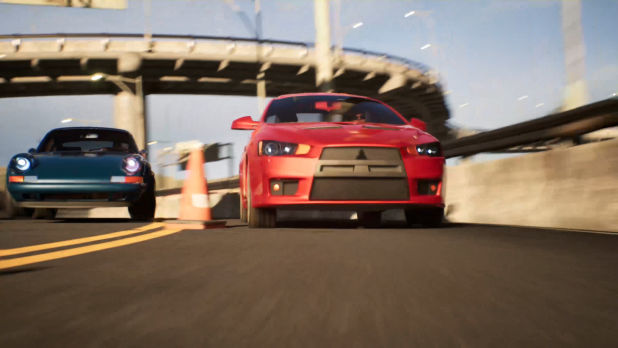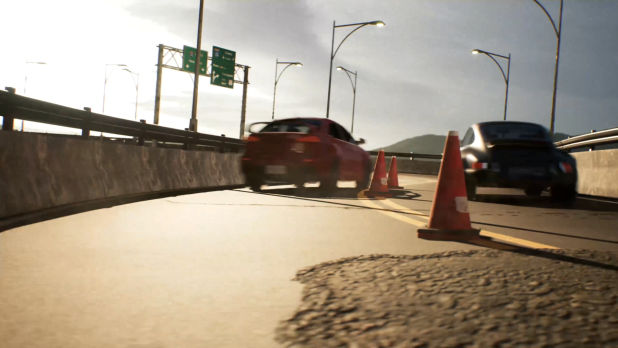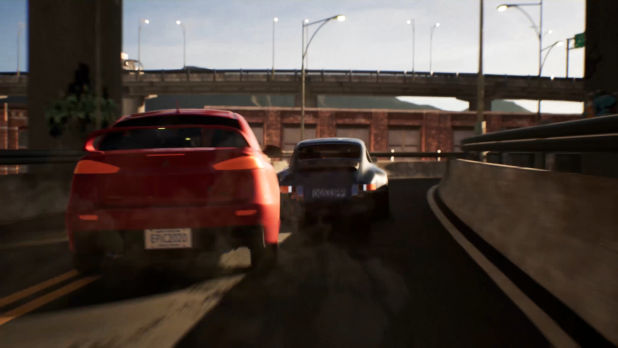
Oscar Gaya discussed the production of his cinematic project Car Chase, talked about the procedural road generator created in Houdini, and shared the tool for download.
Introduction
I’m Oscar Gaya, a CG Artist based in Barcelona.
At this moment, I’m working as a VFX artist for Hexworks, a new studio created by CI Games where we are developing Lords of the Fallen 2, a “Soulsborne” game set in a dark fantasy theme.
Previously, I have worked on shows like The Mandalorian and Lost in Space. I have also worked in video game companies like King (Activision Blizzard) and Gameloft doing mobile games and many other local companies doing animation films, architecture visualizations, and even photography.
I don't want to bore you with details. I can summarize it by saying I’m a VFX artist with technical and generalist background with more than 15 years in the industry.
Getting into 3D
My first experience with 3D software was in high school (around the Pleistocene 1992). I can’t remember the name of the software, but it ran on a Commodore Amiga 2000. As a final course project, we did a billiard pool with three balls colliding, it wasn’t too exciting but that simple animation got me hooked.
Years later I bought my first PC (a Pentium 100 8Mb of Ram, yeah! I have a washing machine more powerful than “that” now), but it gave me the opportunity to play a bit with 3ds Max 2. Without the internet, it was a bit difficult to understand. I just pressed buttons to see if they were doing anything and the only way I knew how to model something was by using booleans (what made the computer crash all the time).
It wasn’t until I started to study cinematography that I got a decent computer. At that point, I focused more on 3D and I started to learn Maya in my spare time. Since it was difficult to make a living in the poor film industry in my country, I decided to learn 3D (which was a completely new thing and was even poorer but who cares if it was my passion).
I have been a self-taught artist since then. I remember reading the full manual of ZBrush 2 when it was released. After that, and with the appearance of Buzz3d, CgTalk, youtube, and the increasing culture of free sharing and generosity of the community, it has been much easier to learn new things.
Car Chase Cinematic: Idea
The reference and starting point of the cinematic was super clear to me. As everybody knows, the process of creating a 3D project is always long – hours of work and nights without sleep. You have to be patient and take care of all the details. And often, after working on a project for a while, I get bored and abandon it.
One day, while procrastinating and watching youtube, I discovered “Lazy Tutorials” by Ian Hubert (who is a well know artist in the Blender community). Basically, they are one-minute tutorials that show very simple techniques of how to create "ok-looking" assets in a fast way. Those tutorials were a shot of energy and I started to think about how to recreate one of his videos (a car chase in Blender) but in real-time in Unreal and using Houdini Engine.
The idea here was to try to make a project simple and fast enough so that I could create it in my spare time after work and not drag it on forever. To make assets fast, not perfect, but good enough for a blurry and shaky cinematic. Initially, the idea was to make it in a week.
Working on Models
I used Maya for rigging, animation, and treatment of 3D assets. Essentially, Maya was the bridge tool.
I searched for appropriate cars on CGTrader and one of them was an extremely detailed model, a brilliant piece of art (I’m sorry I can't find the name of the car artist). I had to make an intensive pass of clean-up and poly reduce to make it appropriate for a real-time project. After that, I exported the FBX file to Unreal and applied the materials.
For the buildings, I started from a picture of a factory and modeled volumes like windows and columns in a super-fast way. I followed the same technique for the road signs. I didn't want to spend too much time on this.
Road Generator Tool in Houdini and Unreal
I wanted to make the roads in a procedural way. In a nutshell, I wanted to have a tool that automatically generates a complete road from a simple spline. For some people, this might sound like dark magic but actually, it is a well-known process. Most of the software solutions that are based on connecting nodes have this philosophy (Substance, Nuke, Houdini). It's a non-destructive workflow since you don’t have to collapse layers or delete histories. Everything is there and is accessible at any moment. Houdini does this very well because it’s based on that system throughout all the software.
Taking a spline as a starting point, we can use it to extrude a box along its course, extrude a handrail, or copy instances on each point of the spline. This is the main process I followed to generate the road. Each piece is based on that initial spline.
SideFX did a great job with Houdini Engine, and there's a plugin for Unreal and other software that allows artists to connect those apps and Houdini. It’s like controlling Houdini remotely and getting the results inside Unreal. What I did was to generate a tool (called HDA in Houdini) that controls in Unreal what Houdini has to do. In my case, I exposed parameters like the width of the road, the number of columns, the height of the barriers, the number of light poles, etc.
But what if I want to use Unreal materials on the mesh generated by the tool? The tool allows me to insert the path reference of desired Unreal materials and apply them directly, during the road creation. This way the only thing the user has to do is draw a spline.
But at this point, I realized something important. This process required generating UVs automatically on the fly and adjust them according to the correct scale. Finally, I found a way to do that and I think it works pretty well.
To give back to the community that shares the knowledge without expecting anything in exchange, I made the tool available for download – it can be tested by anyone who has an Indie license of Houdini and the plugin installed.
Road Details
All elements related to the road, except for the signs, are also procedurally placed. Inside Unreal, I can tweak some values like the number of posts, height and width, material to apply, etc. Unreal sends this information to Houdini through Houdini Engine. Houdini runs the tool in the background and sends back the result to Unreal. What the tool did is: read the spline drawn in Unreal, resample it with the value of “Posts number” parameter, copy instances of the posts to those points and send the result back to Unreal. This is a simple procedure used with most of the road elements.
Once I was happy with the shape and placement of the road, I baked it and converted it to a static mesh inside Unreal (which means it couldn’t be tweaked anymore). Then I placed the road signs by hand and dressed the stage with decals of imperfections to add variety and realism.
Lighting and Rendering
For the lighting, I started with an HDRI backdrop with a desert background. I was looking for a cinematic LUT similar to Bad Boys movies and the characteristic Teal and Orange color grading. I had a clear idea of a fast and full of action cinematic, therefore I wanted to use a low angle sun and a very contrasty scene. All had to be rude, dirty, sharp, fast, and noisy like a metal band.
I spent time looking for interesting shadows in the scene, then I tweaked the post-process volume for the final color grading, motion blur, vignetting, and so on.


Sadly, my graphics card does not support real-time ray tracing (someday I will have such power) and I could not use the features of the engine related to it.
To render the cinematic I used Sequencer and animated cameras in Unreal, nothing fancy here. Unreal has a pretty straightforward “Video editor” system, but it required a bit of experimenting on my side. The scene was exported as a sequence of images.
The render was not edited in any post-processing software after exporting it, it looks the same inside the engine. The only thing that was added after the render is the sound, which was edited in compositing software. The sounds of the cars correspond to the actual car models in order to give a point of realism and boost the action shown in the images.
Challenges and Plans
My biggest challenge was doing the things that I’m not used to. I was out of my comfort zone in several phases and this fact made me learn new things. For example, I had a lot of problems with rigging the wheels. Before that, I never exported a skeletal mesh from Maya to Unreal and I think I have had to repeat the process two or three times for each car. I wanted the car to follow a spline to animate it but it appeared with a 90-degree turn in Unreal. Next time, I forgot to rename the bones in the correct way, then later, the bones were not placed precisely in the center of the wheels and they rolled in a bizarre way, etc.
On the other hand, it was my first time rendering a cinematic with Sequencer and I had to watch several tutorials to learn how to do it. I think it’s a fantastic tool and given the quality of the result, it makes me think about the necessity to wait hours for rendering with traditional tools. It’s clear that the industry is going in this direction – we can see that virtual productions are becoming a trend and the demand for Unreal technical artists in VFX companies is growing.
And last but not least, I think the most difficult part was time management and commitment needed to finish the project in one week. And I did it eventually!
For the next steps, I have a couple of projects in mind. One is to make a Star Wars spaceship battle using Megascans and the other is to make a team project which implies different challenges. I've heard it somewhere that when you go alone, you go faster but when you go together, you go farther.


0 comments:
Post a Comment